DIY Solar Oven S'more's Activity
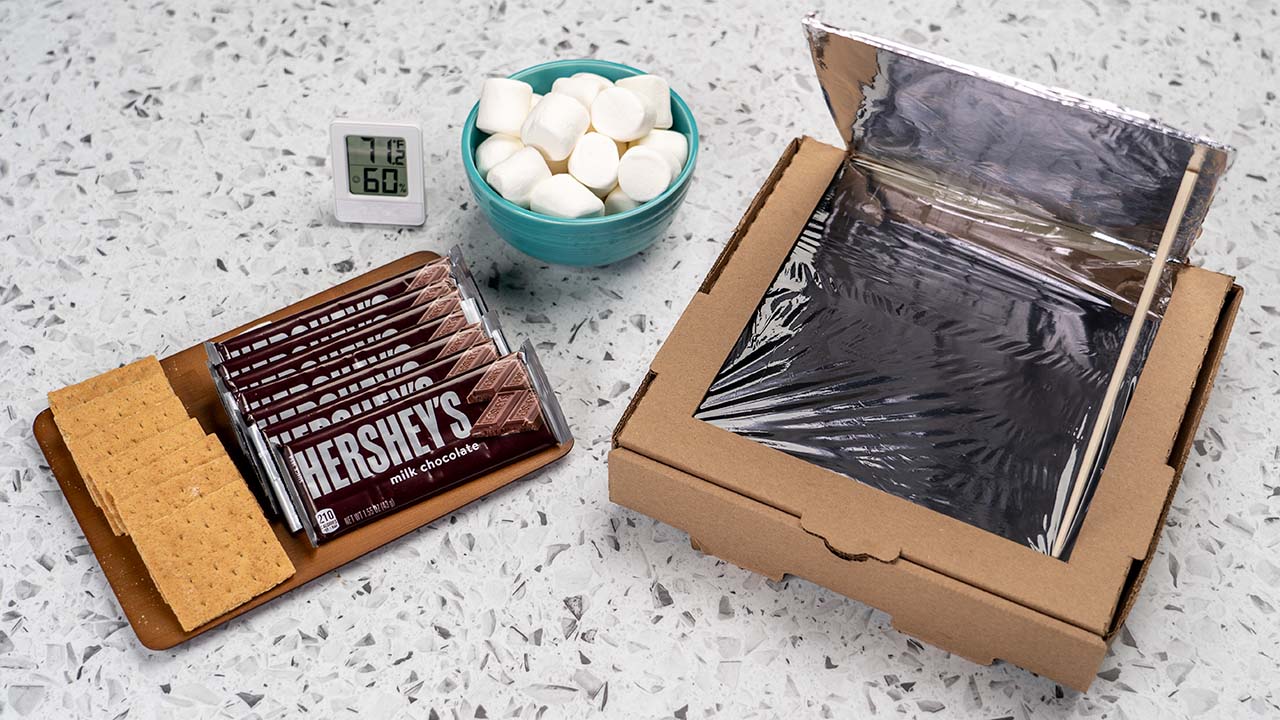
Combine the sweetness of s’mores and science with this DIY Solar Oven S’mores activity! This uses a DIY solar oven to harness the sun’s energy to melt S’mores into ooey, gooey goodness. It’s an educational, hands-on project that you and your little ones can make using supplies around the house.
You'll Need & Directions
MAKE MODE:
Prevent your screen from going dark.
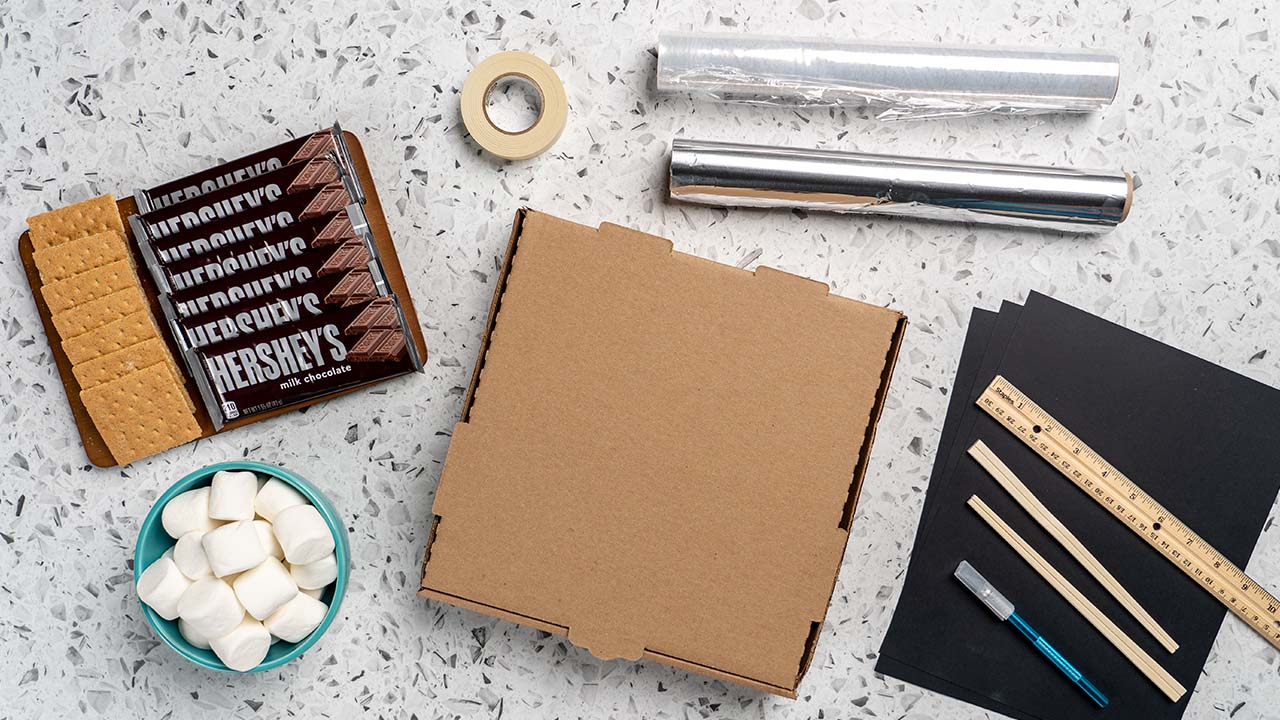
You'll Need
-
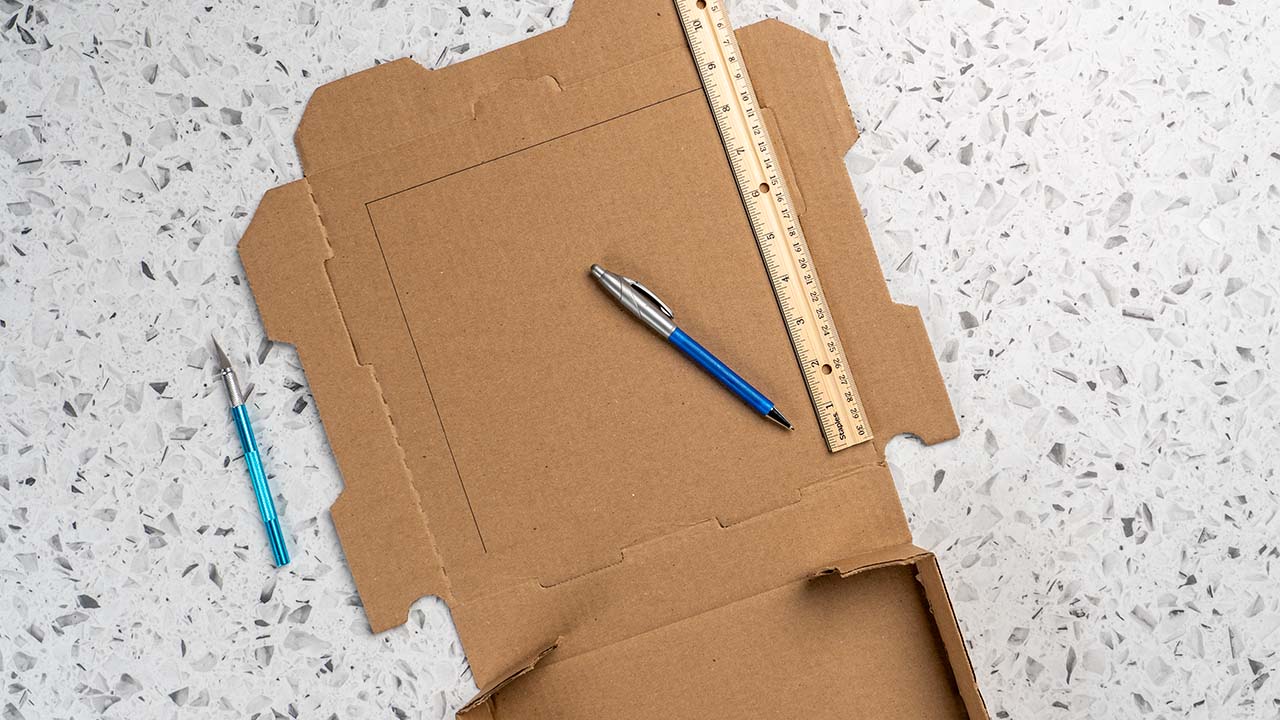
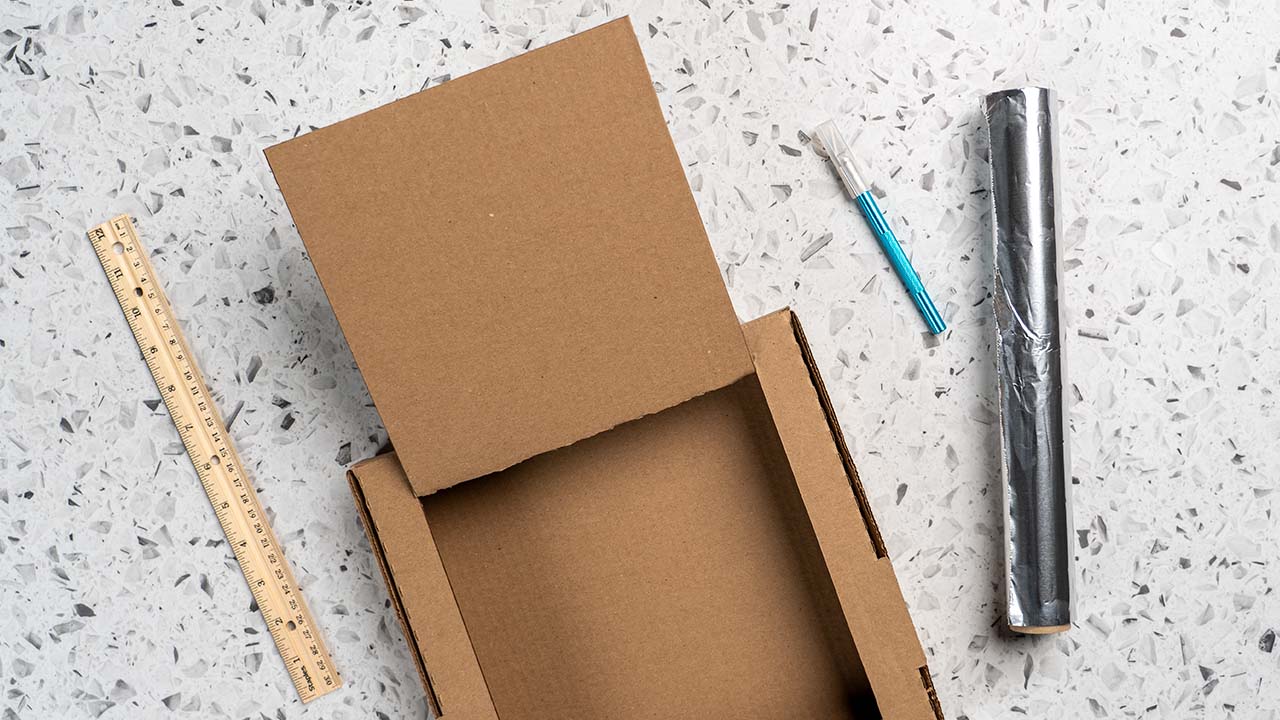
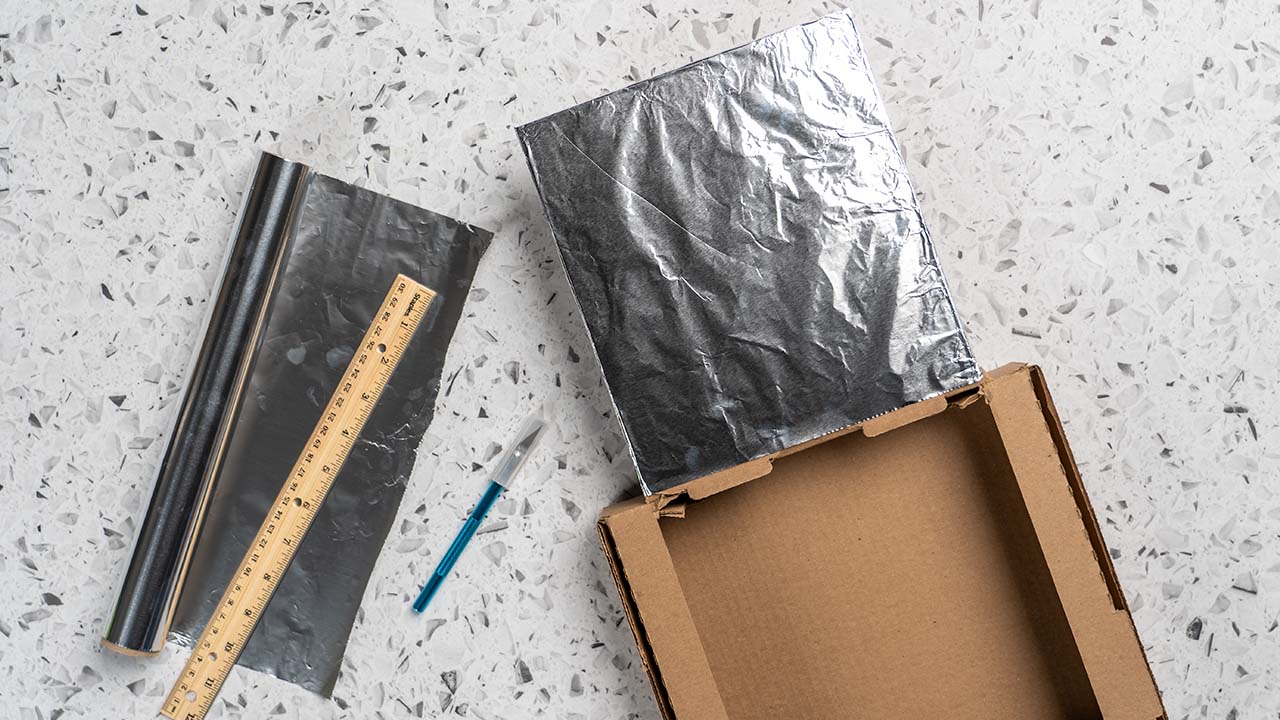
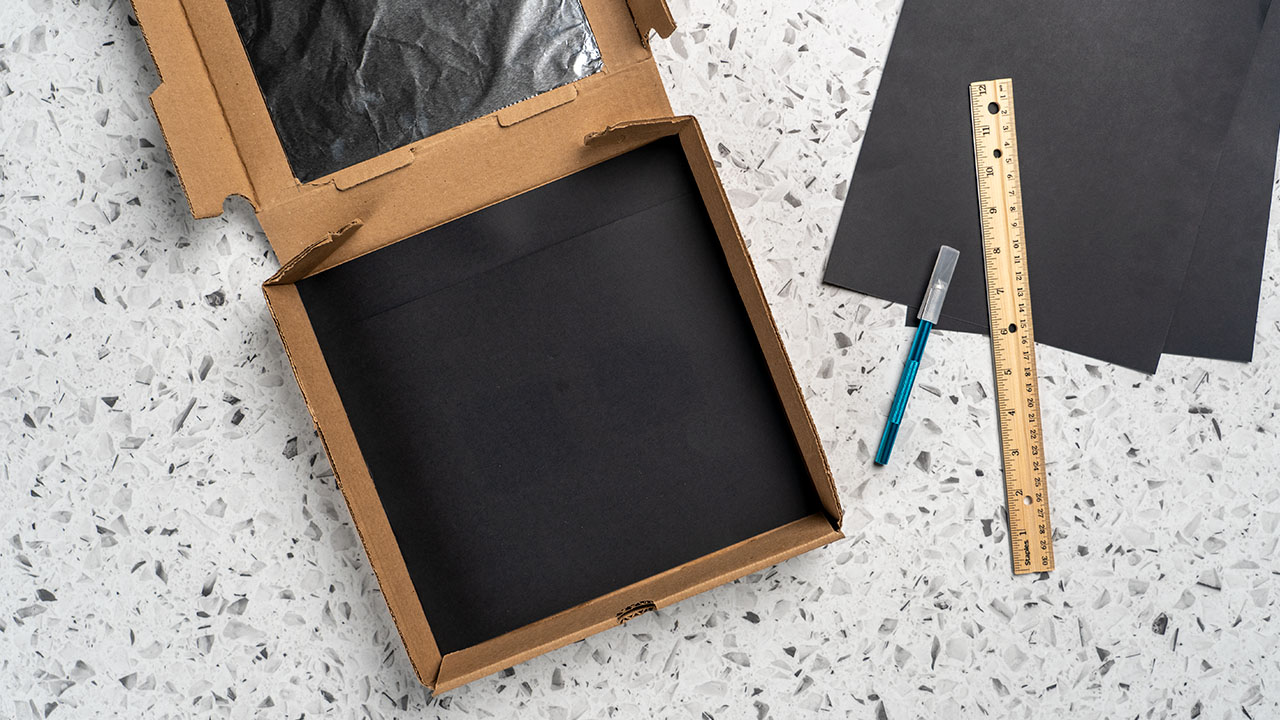
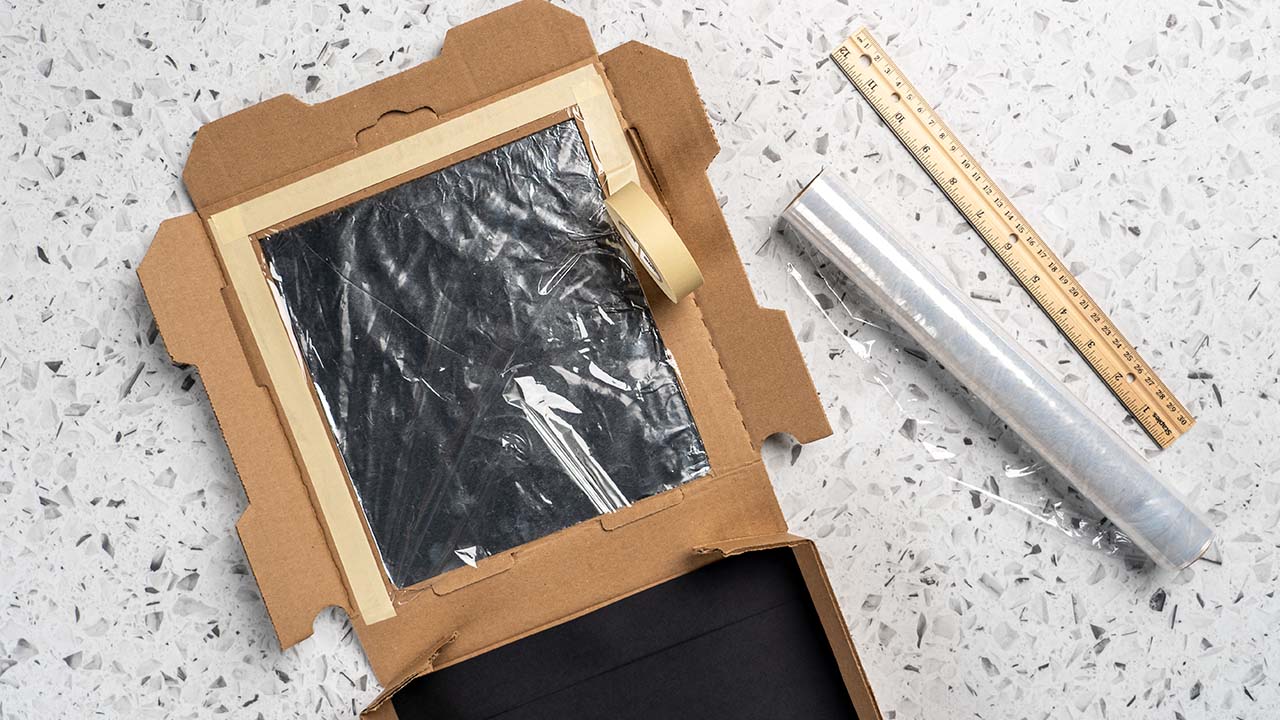
Personal pizza box, shoe box, or another cardboard box with a lid (size depends on the number of s’mores you want to cook)
-
Aluminum foil
-
Tape or glue dots
-
Scissors or utility knife
-
Black construction paper
-
Heat resistant container
-
Plastic wrap
-
or chopstick
-
Cooking thermometer (optional)
Directions
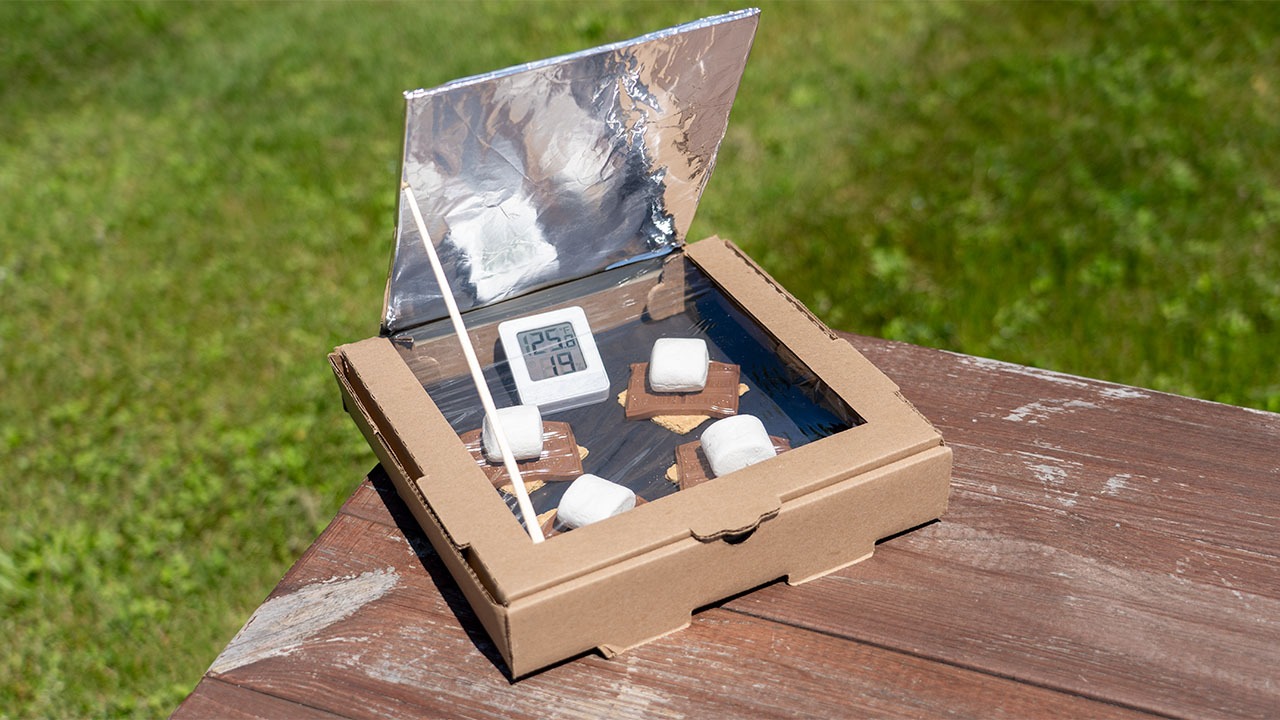
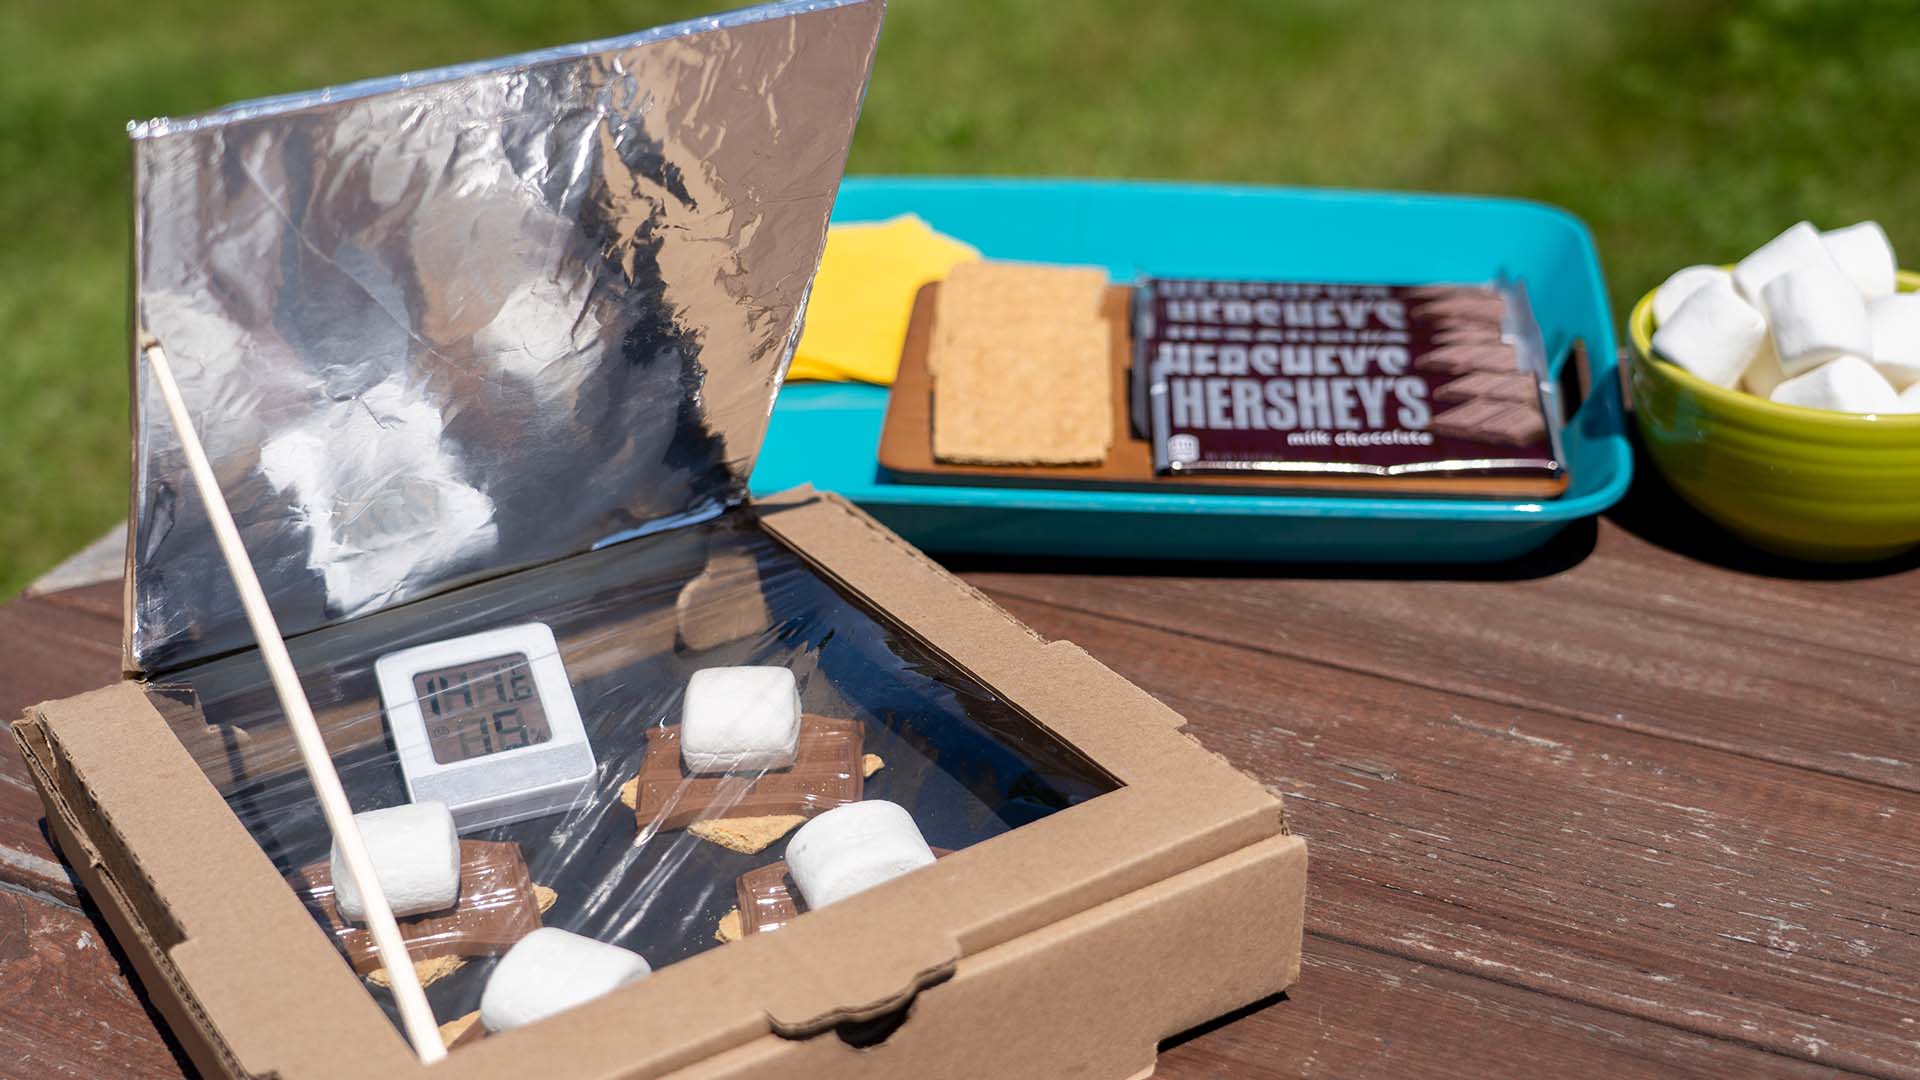
It’s Getting Hot in Here
Optional: Wondering how hot your DIY solar oven can get? Place a cooking thermometer inside the oven to monitor the temperature. The melting point of chocolate is between 86-90F, so once your thermometer gets to that temperature, your S’more will be on its way to perfection!
