If you’re intimidated by cake decorating, don’t fret. Making a beautiful cake is easier than you think. Michelle Lopez (Hummingbird High) joins us to explain how to achieve picture-perfect cakes with just one tool: the mighty offset spatula!
I've partnered with The Hershey Company to bring you a quick guide to decorating a cake beautifully with just a handful of tools and ingredients!
I get a lot of folks that ask me for tips and tricks on how to decorate cakes, and I always tell them this: don't panic, it's easier than you think. On Instagram, you'll see a lot of videos and tutorials of folks using fancy decorating tips, fondant, paint brushes, and more. But the truth is that you don't need all that to create a beautiful cake. In fact, all you really need is just one tool — the mighty offset spatula. Using just an offset spatula, I'll show you how to create four of the most popular cake decorating styles on Pinterest and Instagram today.
Before we begin, I thought it would be a good idea to start with some general cake prep to set us up for success before we even start decorating:
Level your cakes. The secret to a beautifully decorated cake actually happens before frosting even touches the cake. For an even layer cake, you'll need to level the cake. Unless you have a super good oven, it's likely that when you pull out your cake, the middle will have risen more than the sides (making it look like a giant, flat muffin). The reason why this happens is because the sides of the cake pan conduct heat quicker than the inside of the cake — this means that they'll set early and stop rising, while the middle will continue to do so, resulting in that small hill/muffin top in the middle of the cake. For an even cake, you'll need to get rid of that muffin top. The best way is to wait until the cake is cooled completely, and use a long, serrated knife (similar to a bread knife) to carefully slice off the top, using the sides and edges of the cake as a guide to keep your knife even. Similar to frosting a perfectly smooth cake, this requires some practice, but is easy once you get the hang of it.
Freeze your cakes. Freezing each cake layer for at least an hour in advance will make frosting the cake way easier — it'll help hold the crumbs in, as well as create a firmer, smoother surface. To freeze a cake without ruining its taste or flavor, wait until each layer is fully cooled to room temperature. Level them (as described above), and then immediately wrap each layer tightly in plastic wrap. And just to make absolutely sure that no part of it is exposed, you can double wrap it and then finish with another layer of aluminum foil to prevent any weird smells or tastes getting into the cake (this is only worth it if you're freezing the cake for longer than a few days or so).
Use a crumb coat. A crumb coat is a very, very thin layer of frosting. It basically helps prevent any loose crumbs from being pulled and picked up by your offset spatula while decorating. After making a crumb coat, it's best practice to let the cake chill in the refrigerator for at least an hour.
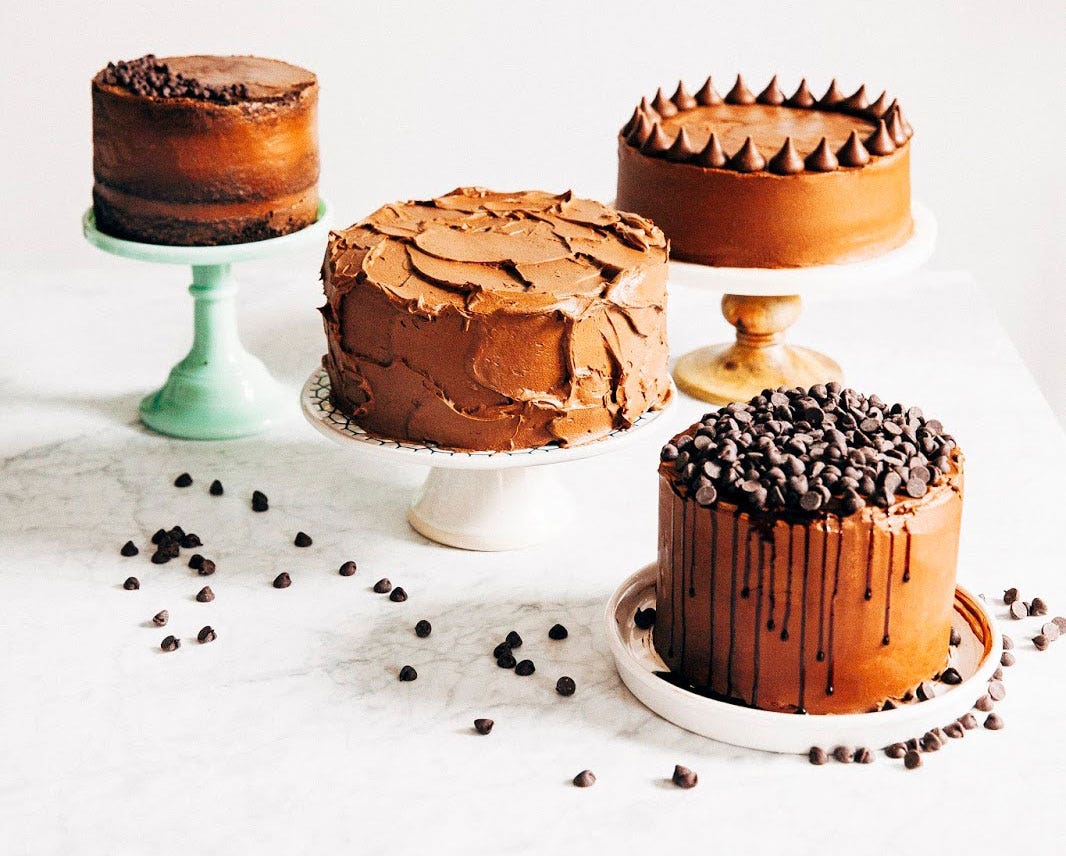
Now that we have the basics covered, we can get to the fun part — decorating! Below are four common styles in modern cake decorating today:
1. The Naked Cake
The Naked Cake exploded in popularity over the last few years — if you're not a fan of frosting, this cake is for you! Instead of being decorated with the many cups usually required to make a cake perfectly smooth, this cake is decorated with a very thin layer of frosting just enough to seal the cake and keep it from drying out.
Get the look: Take your offset spatula and spread a small amount of frosting all around the cake. At certain points of the cake, the crumb should still peek through. The overall look should be rustic. Finish by topping the cake with any decorations you might have — I like using HERSHEY'S Kitchens Mini Chips Semi-Sweet Chocolate Chips!
(And P.S. Yes, the Naked Cake is basically just a cake with a crumb coat. Shhh.)

2. The Perfectly Smooth Cake
The Perfectly Smooth Cake is probably the most common look for cakes with its all-smooth sides (so smooth that the cake even looks glossy!). Of the four I'm discussing today, it's definitely the most formal and has been the standard look for celebration cakes for many years. To make the cake extra festive, I topped it with HERSHEY'S KISSES Milk Chocolates — I love the way the HERSHEY'S KISSES Chocolates match the chocolate frosting. It almost looks like it's piped!
Get the look: Unfortunately, of all four looks, this is probably the hardest one to achieve for the home baker. It takes lots of practice and some special tools in addition to the offset spatula to really perfect the design. For this look, I recommend first making a crumb coat (see my notes above) and chilling for at least an hour before frosting to help keep your final coat nice and clean. I also recommend getting a rotating cake stand. Set the cake on the turntable and use your offset spatula to add a little bit of frosting at a time until you have a thick, even layer of frosting on all sides of the cake. It doesn't have to be completely smooth, just even — this is important! Make sure to use a generous amount of frosting, because you're going to be scraping most of it off anyway.
To achieve the super smooth edges, hold your offset spatula in your dominant hand and then use your other hand to control the turntable so you can slowly and carefully turn it as close to one complete rotation as you can. Begin rotating the cake and then gradually press the flat of the offset spatula against its side, continuing to rotate at an even pace. The offset spatula will scrape and smoothen the cake. Scrape off any excess frosting into a bowl, and continue until the desired smoothness is achieved. Again, don't beat yourself up if it's not perfect! Like I said, this look requires a lot of practice.

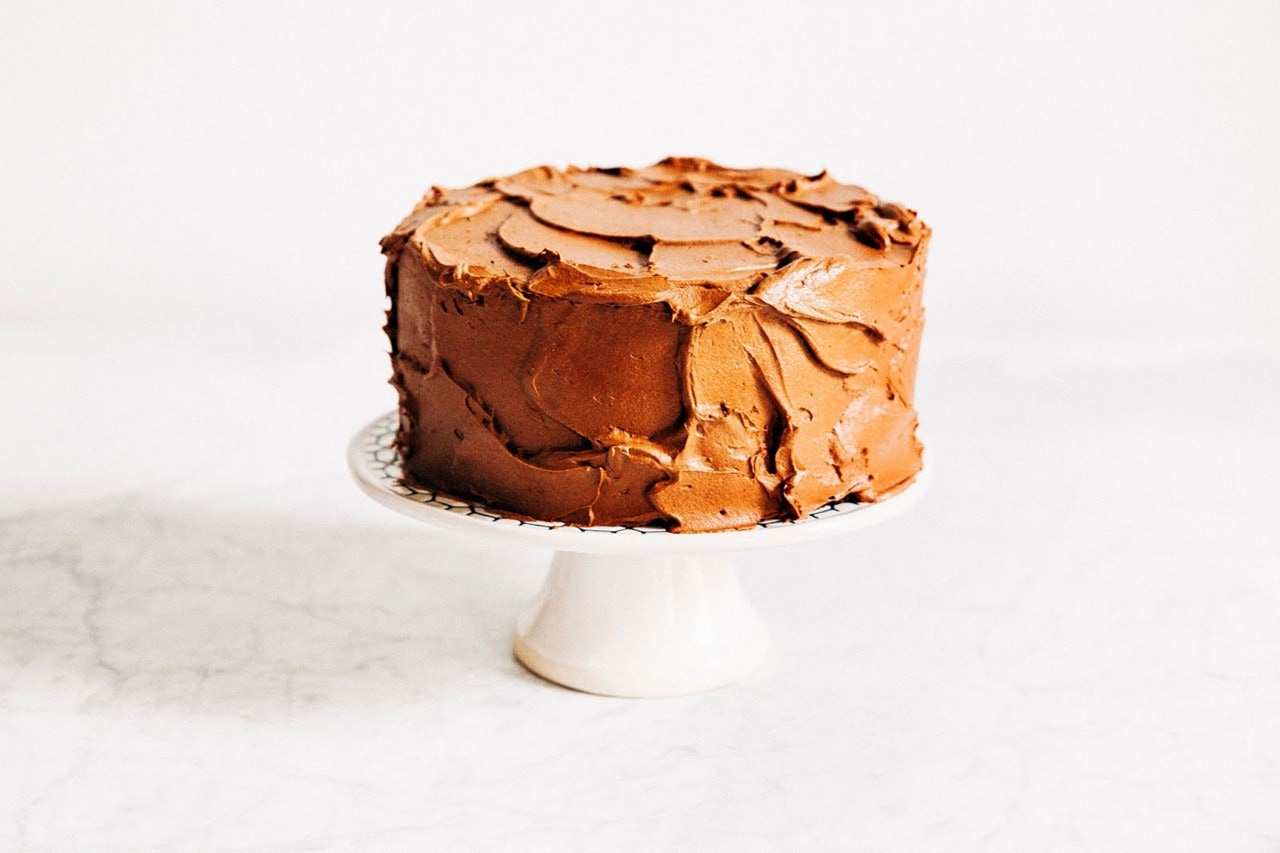
3. The Perfectly Rustic Cake
The Perfectly Rustic Cake is probably my favorite cake look, and one that is incredibly easy to master as a home baker. Defined by its artfully messy swirls, it manages to be both impressive and effortless at the same time!
Get the look: Depending on the kind of cake and frosting you use, you might be able to get away with not using a crumb coat. A creamy frosting (like fudge or cream cheese) with a sturdy cake probably won't require one, but I would recommend one if you're pairing a stiffer frosting (like buttercream) with a cake with a loose crumb. Set the cake on its serving plate and use your offset spatula to add a little bit of frosting at a time until you have a thick, even layer of frosting on all sides of the cake. Once the frosting is evenly applied, use the offset spatula to give it some natural-looking swirls and strokes. It's important not to overthink this step — use big, sweeping motions for an effortless look!
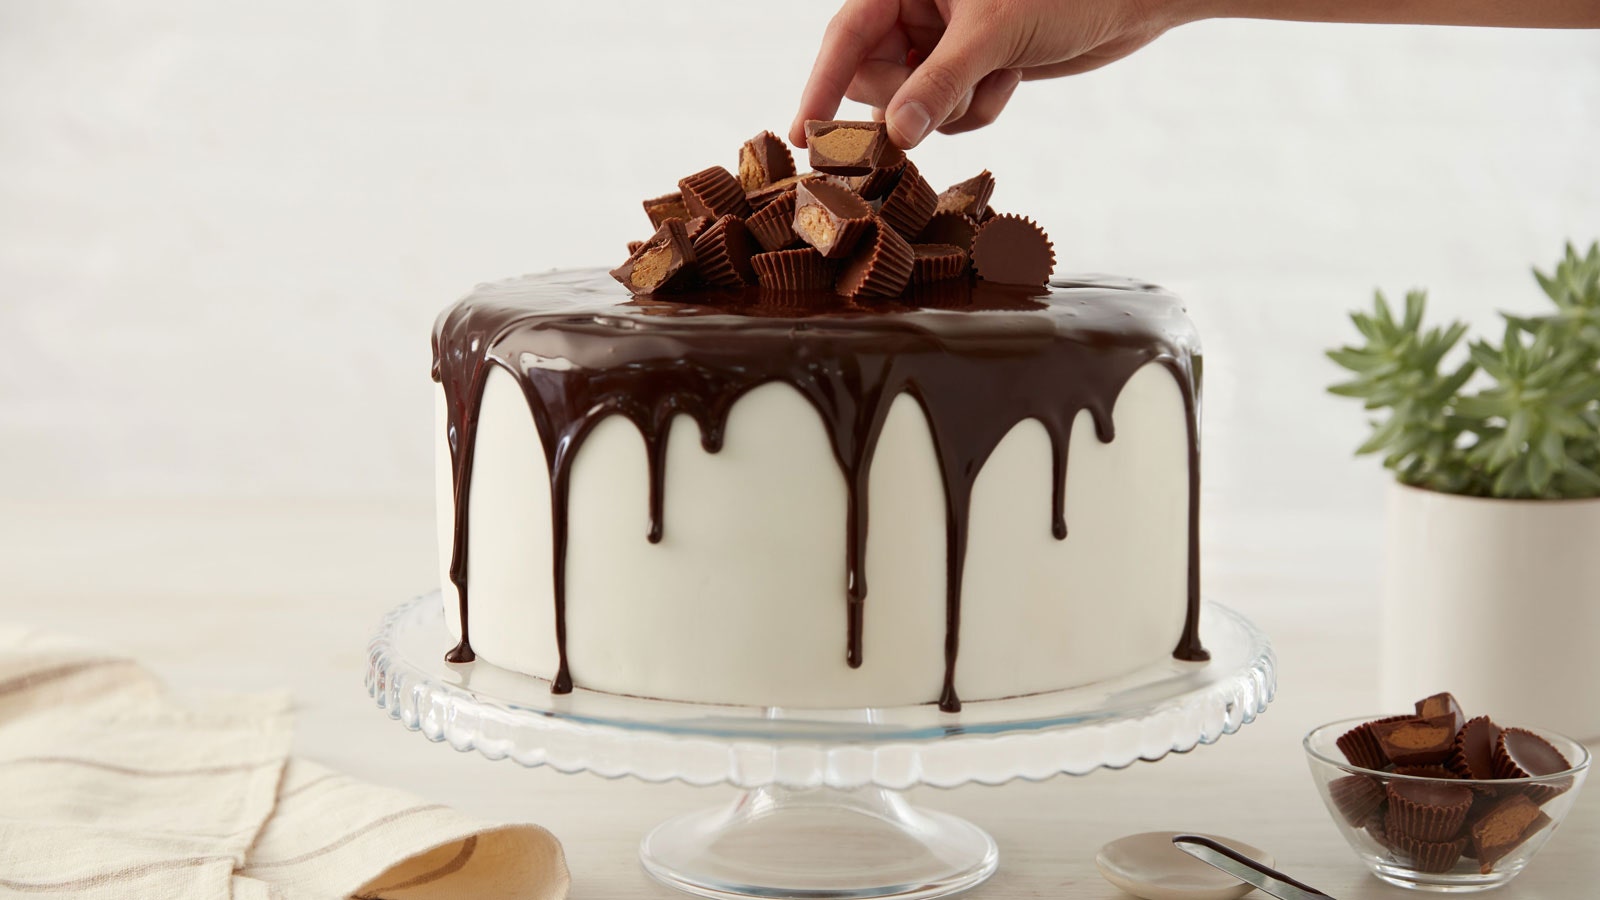
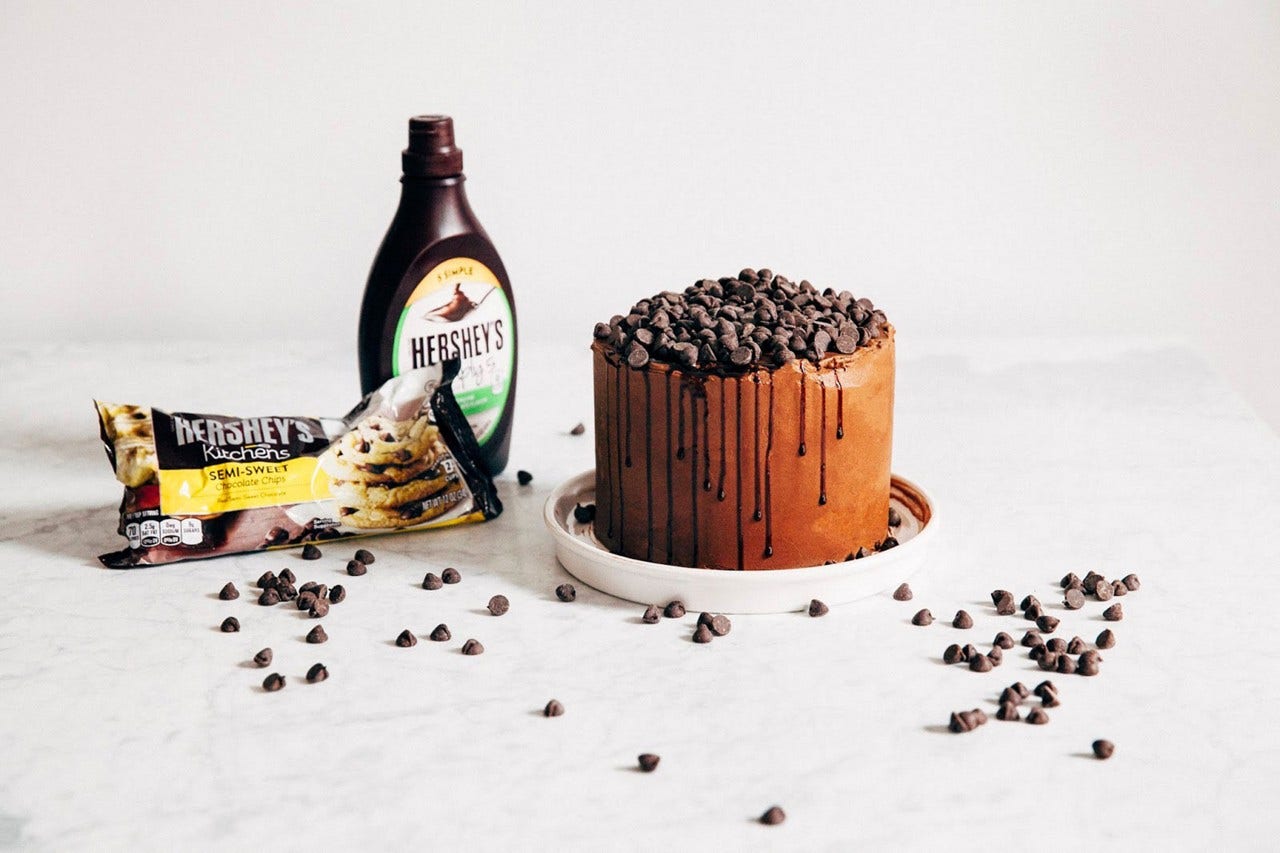
4. The Drippy Cake
Similar to Naked Cakes, Drippy Cakes came into popularity in the last few years thanks to Pinterest and some star Instagram accounts. Unlike the other three cakes described above, the Drippy Cake is more of a finish as opposed to a decorating technique. Naked, Perfectly Smooth, and Rustic cakes can all be drippy cakes. The Drippy Cake is mostly defined by its chocolate syrup topping gently dripping off the top of the cake. You can make the chocolate syrup from scratch, but I like to save time by using HERSHEY'S Simply 5 Chocolate Syrup.
Get the look: Contrary to popular belief, there's a little bit more technique required to get the right drippy look — too much syrup can lead to a messy, drenched cake. Start with a frosted cake of your choice and set it on the final cake plate or stand that you're planning on using. Carefully spoon a teaspoon of syrup at the top of one of the cake's edges. Watch the drips cascade down the cake carefully — this will help you gauge how much syrup to use. If you started too far away from the edge of the cake, you can use an offset spatula to gently push the syrup towards the edge of the cake and get a drip going. If you're making the entire cake drippy (I only did an edge), carefully work around the border of the cake until it is completely garnished. You can finish by using an offset spatula to smooth the entire top of the cake with syrup, or garnish with HERSHEY'S Kitchens Semi-Sweet Chocolate Chips like I did.
Some additional notes:
- Other helpful tools include a rotating cake stand and a bench scraper. A rotating cake stand will help you smooth the Perfectly Smooth cake of your dreams. It's definitely worth the investment if you want to be a serious baker. In a pinch, you can balance the center of a cake on an upside down bowl with a wide bottom. Rotate the bottom of the bowl slowly, and be careful — it's definitely not as stable as a rotating cake stand! As for the bench scraper, it can help you smooth in the same way as an offset spatula. Some people find it easier to handle because it's larger and therefore easier to grip and control; give it a try and figure out what you like!
- Don't underestimate the power of common cake decorating accessories like chocolate chips and candies like HERSHEY'S KISSES Chocolates. A lot of folks think that chocolate chips are just for cookies, and that candies are just for snacking, but both ingredients can be used as extra cake decorating flair, and can really add a personal touch to a cake to make it your own unique design.
Thanks to The Hershey Company for sponsoring this post by providing the compensation and ingredients to make it happen! I'm one of the bloggers participating in HERSHEY'S BAKE HAPPY CHALLENGE, where we'll be spending the next few months sharing our best recipes, tips, tricks, and anything else to encourage all you lovely folks to bake. Thanks again for supporting Hummingbird High and all my wonderful sponsors.
To see the original post on Hummingbird High, click here.
